We finally put up a new chandelier in the dining room and I’m in love! We ordered around nine light fixtures before we moved into our house because, obviously, you have to have light! But it’s safe to say that I was rushed and didn’t make all the right decisions. For some rooms, it’s best to live in the house a bit before you pull the trigger. Light fixtures can be the room’s centerpiece and a big deal! Don’t be afraid to wait.
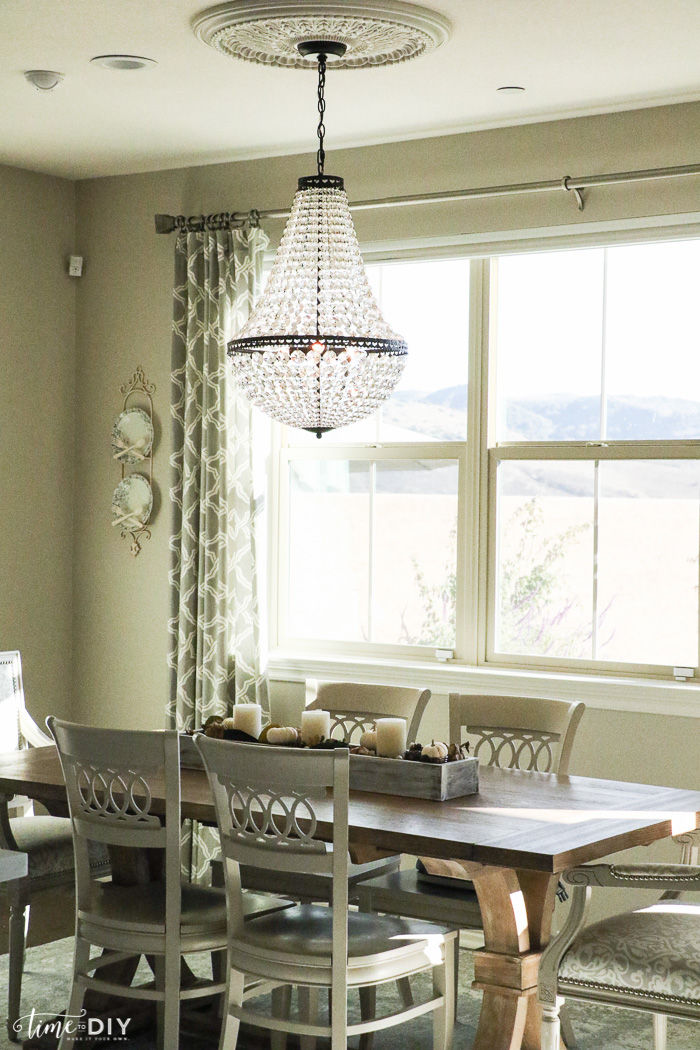
And that was the case for the dining room, which actually isn’t a dedicated dining room, but a nook off the kitchen because of our open concept (which I have a love-hate relationship with – another post) so it’s a bit tricky when all the downstairs fixtures and decor need to tie together.
I originally thought I wanted a chandelier, so we started with this one because of the gray drapes and rug, and I thought the brushed silver would complement. Not to be confused with “compliment” – wouldn’t that be cool if a fixture was throwing out compliments? “That dinner looks amazing!” (maybe that would balance out the kids’ complaints). Okay, enough of the former English teacher homophone rant.
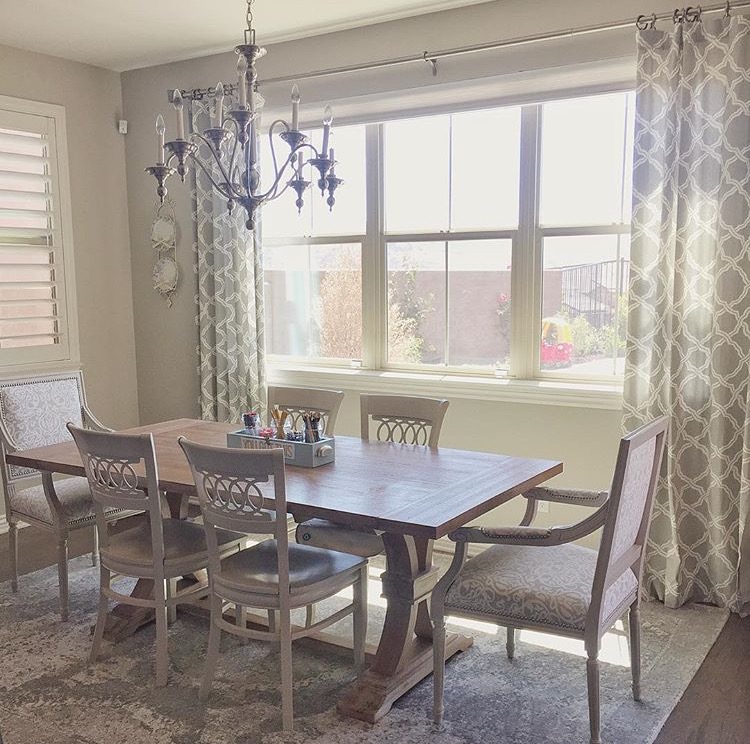
This chandelier was fine, but it made the space feel monochromatic and blah, and it didn’t really tie in as well with the rest of the house. And because of the chandelier’s faulty design, the arms moved easily and it went totally crooked and became our ‘leaning tower chandelier’.
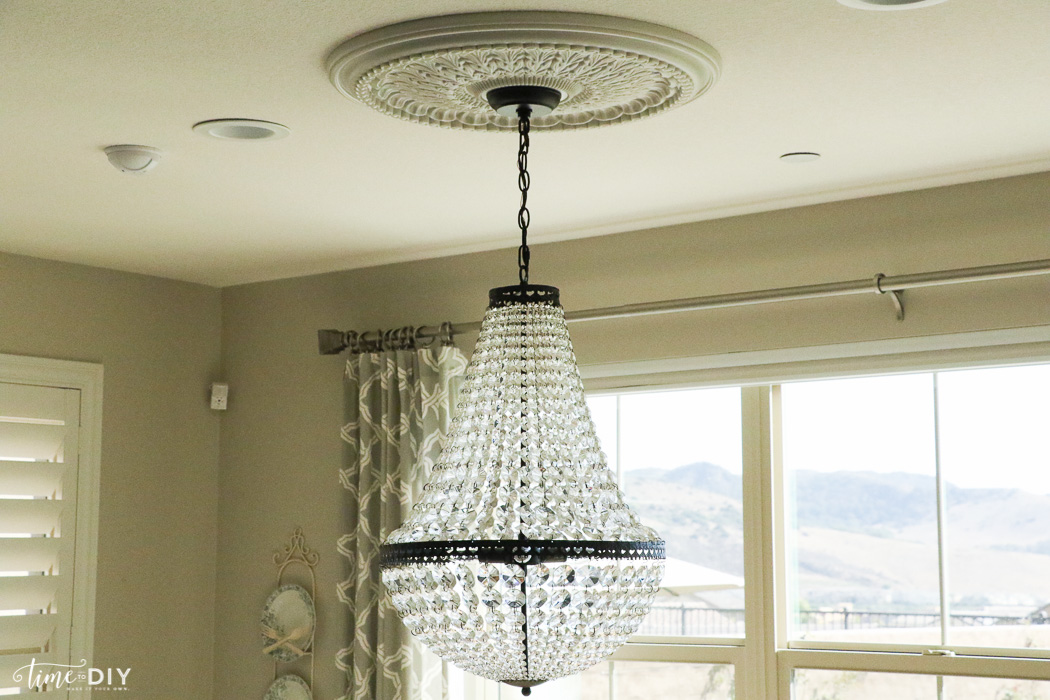
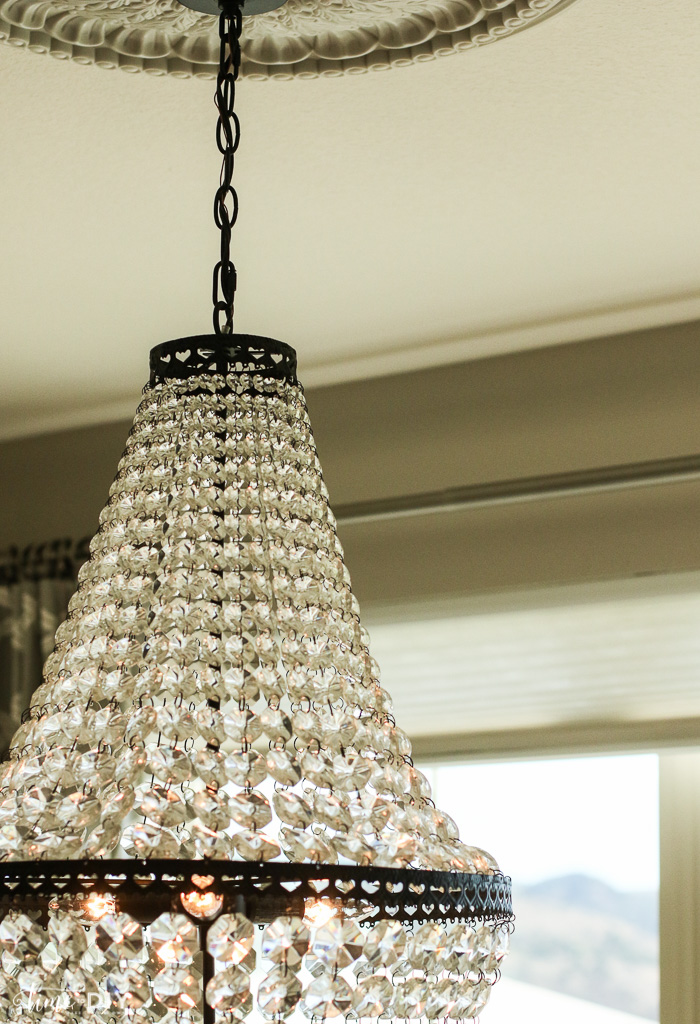
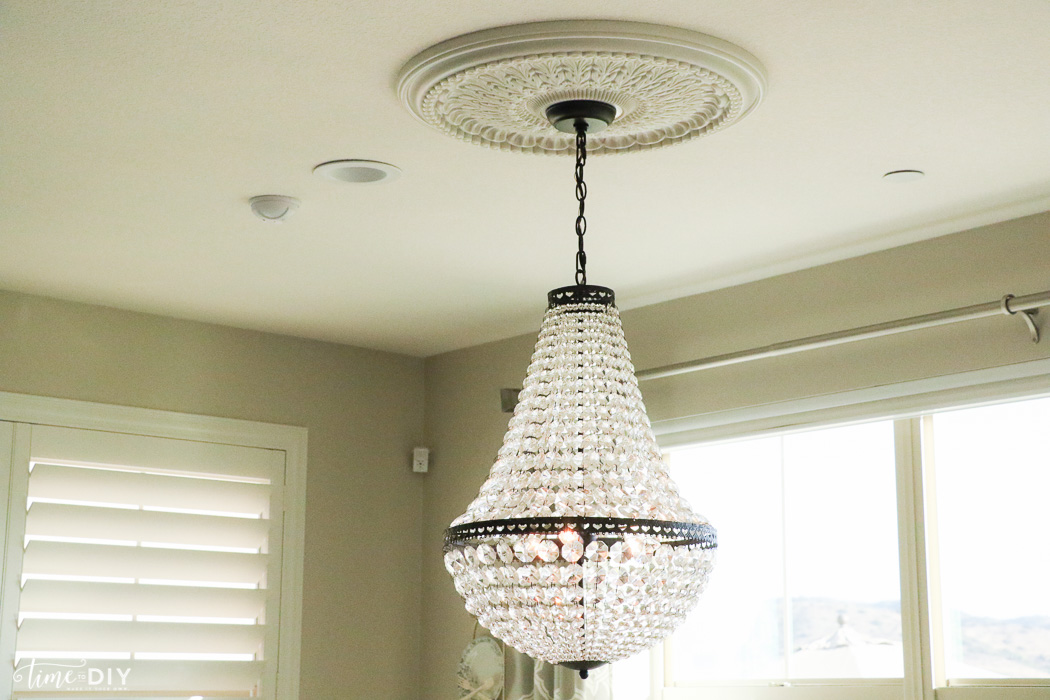
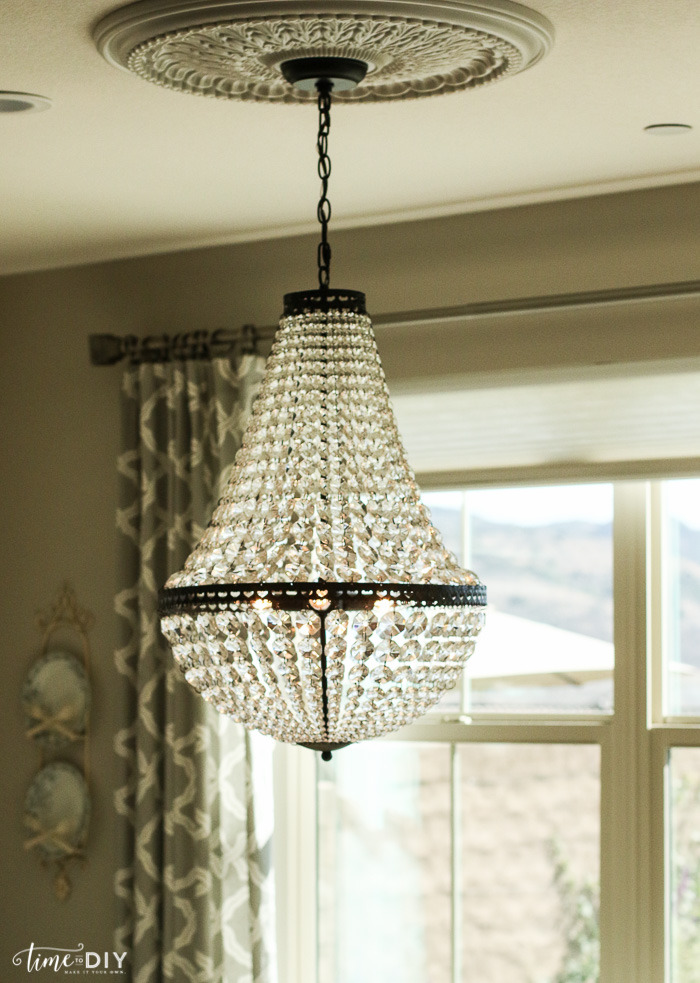
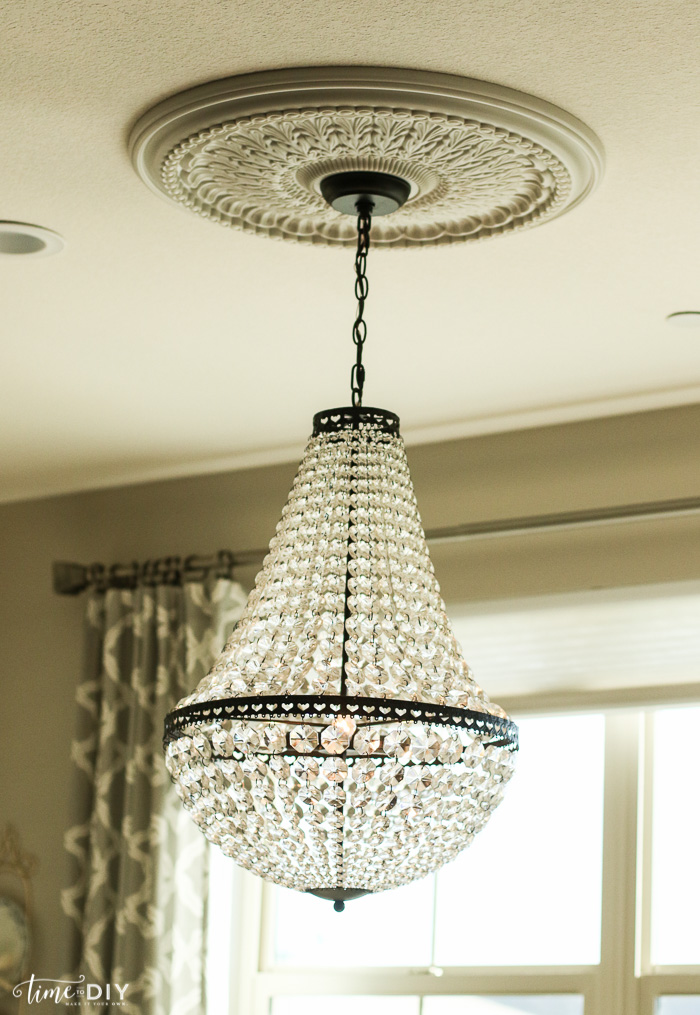
So I’ve been on the hunt for a new one for awhile (it took my hubby a year to approve the purchase) and was tempted by this chandelier, but decided an antique bronze finish would make it pop a little more and tie in with our brown leather coach and wrought iron stairs. I also needed a curvy one to balance out my kitchen backsplash, along with a touch of glam, so I went with this one (and got it for $100 off!).
There are some guidelines on the size to buy based on the size of your space like these here, but for open concept, I usually go with the “bigger is better” and got the larger one.
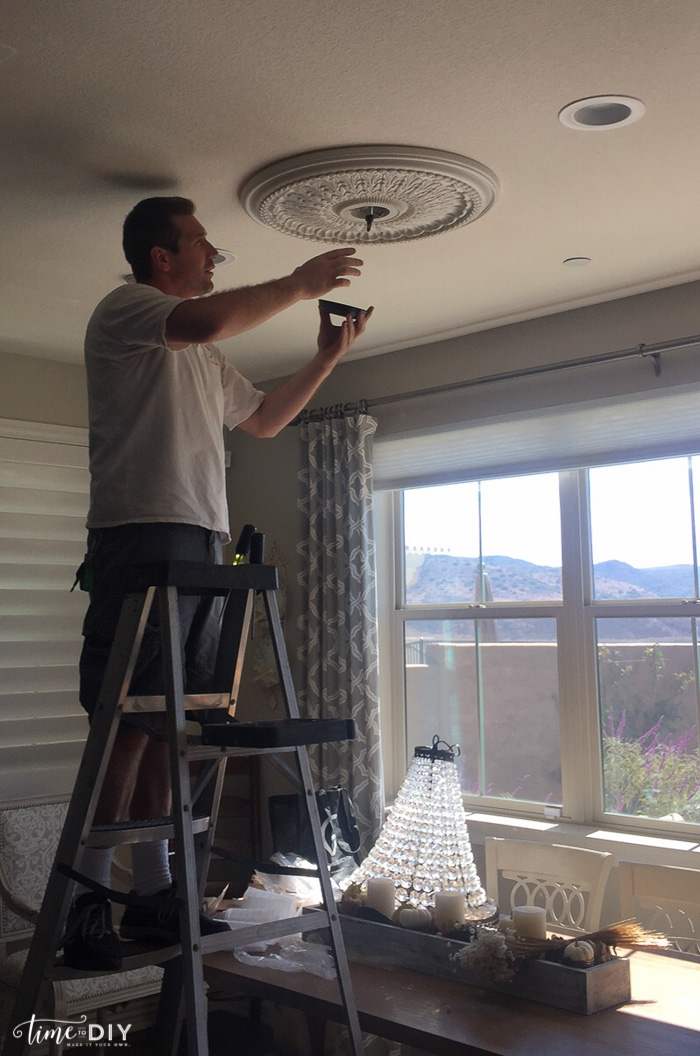
And since I was switching out the chandelier, I figured it was a great time to add a medallion! Unfortunately, I waited too long and my only options were Home Depot and Lowes, but they had some variety.
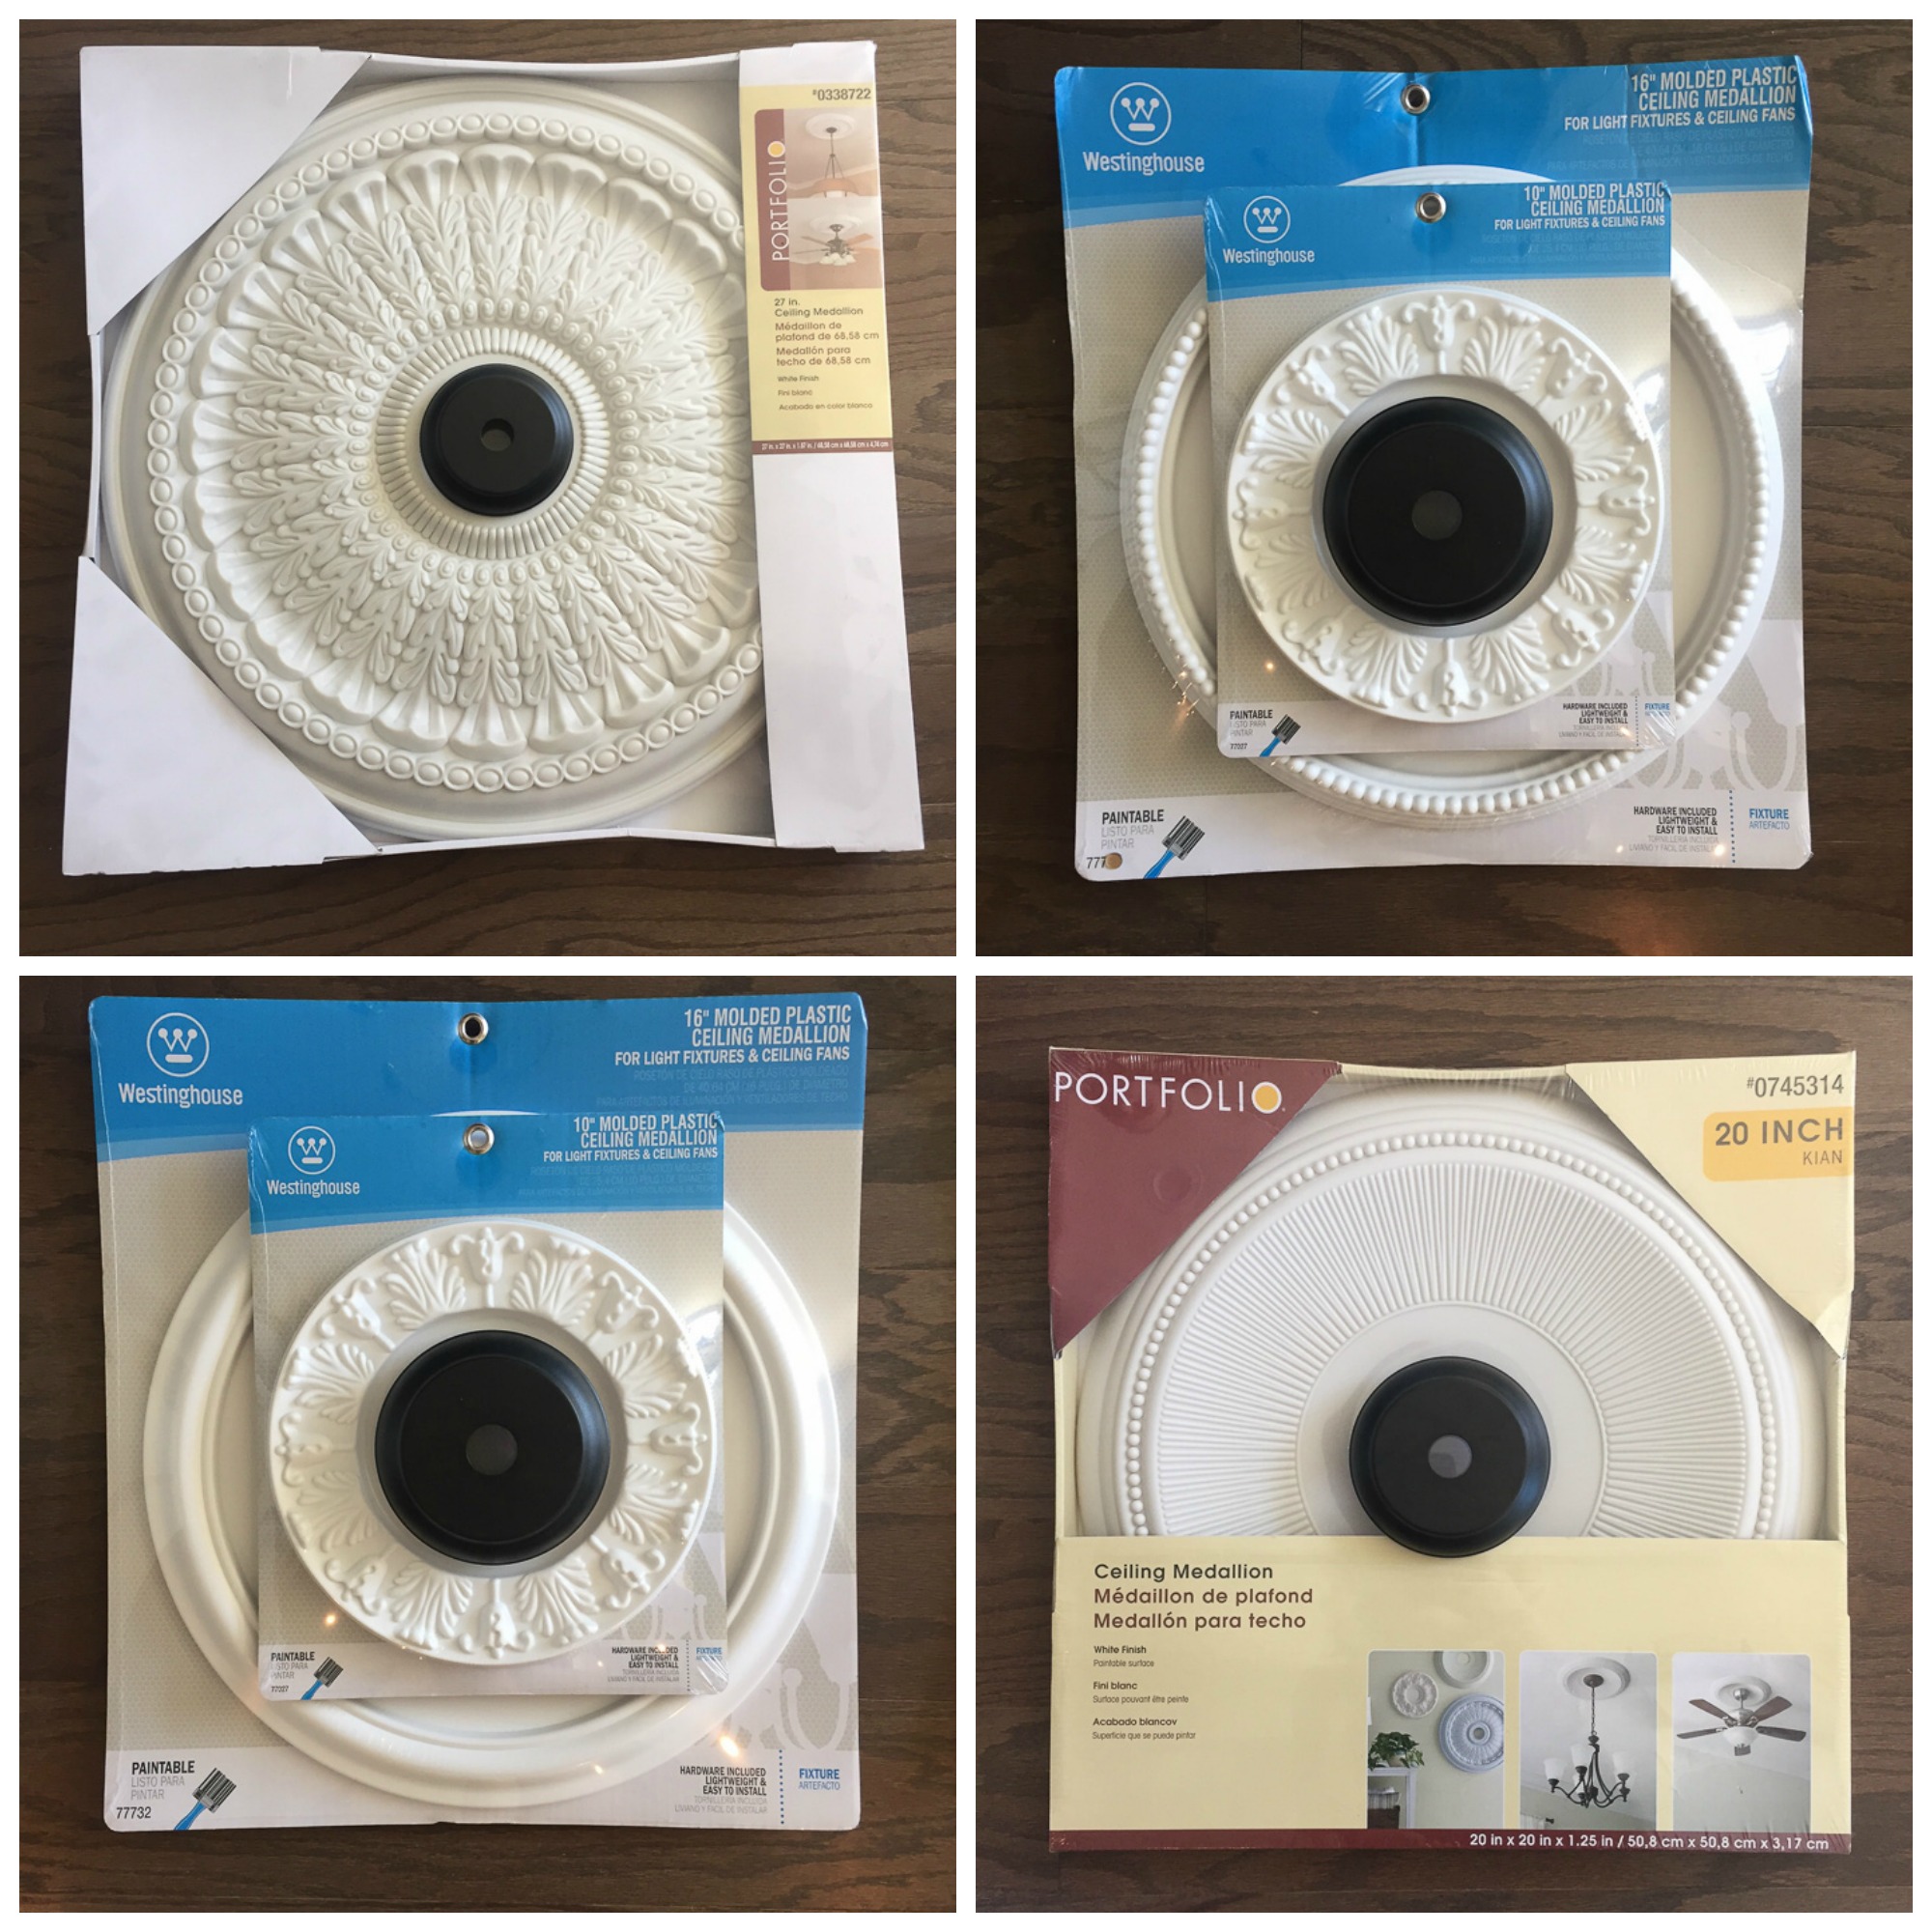
In my extensive googling, I found there are some guidelines for medallion sizes based on the size of the fixture and room, but some say that it’s also personal preference. One designer suggested that the medallion should be either smaller or larger than the fixture so it doesn’t blur together and make the room look smaller.
My chandelier is 19 inches, so with my Home Depot and Lowes options, I would need to go with 16 inches or 27 inches.
So we tried them out, and my first reaction was that 16 inches looked too small.

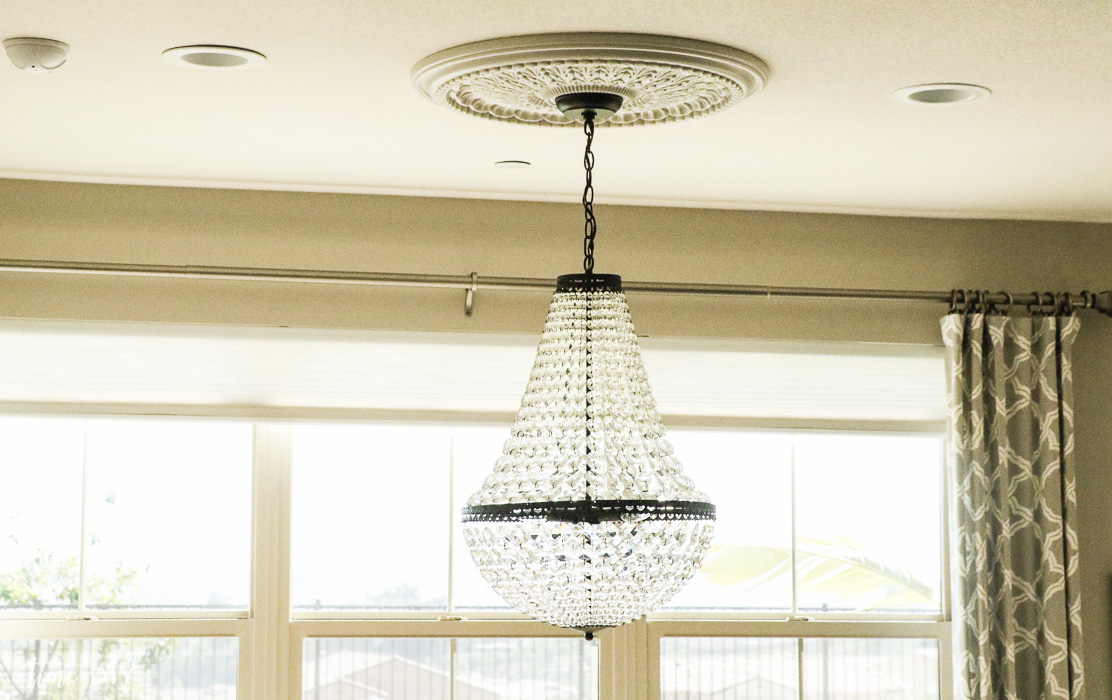
But my hubby still thought 27 inches looked monstrous so we looked at this handy-dandy formula here on medallion sizes based on room sizes. But in the end, because of our open concept, those rules don’t really apply and we went with the biggest (27 inches) one. Once it was up, my hubby agreed that it sort of disappeared into the wall and was the perfect size.
Didn’t have time to paint it, naturally, but that can be done later. Or not.
Sidenote: We often have an electrician install our lighting because my father-in-law is an electrician and gets nervous when we don’t. We love our guy and if you’re in SoCal, shoot me an email if you want his info!
And the final decision (who knew there would be so many?!) was how far it should hang above the table.
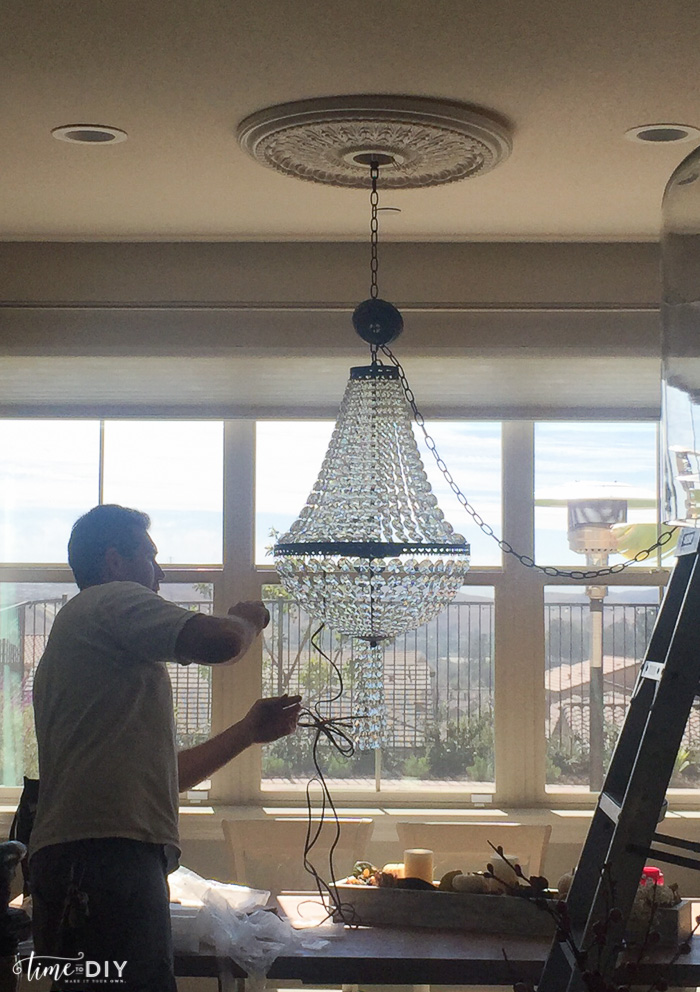
The general “rule,” although most agree it’s personal preference, is to hang a chandelier 30 to 34 inches above a table if you have 8 foot ceilings, and to add an additional 3 inches for each foot of ceiling above that. Ours are 9 feet, so we went with 36 inches and I liked how the top lined up with my curtain rod.
And really I liked everything about it – It totally transformed the space!
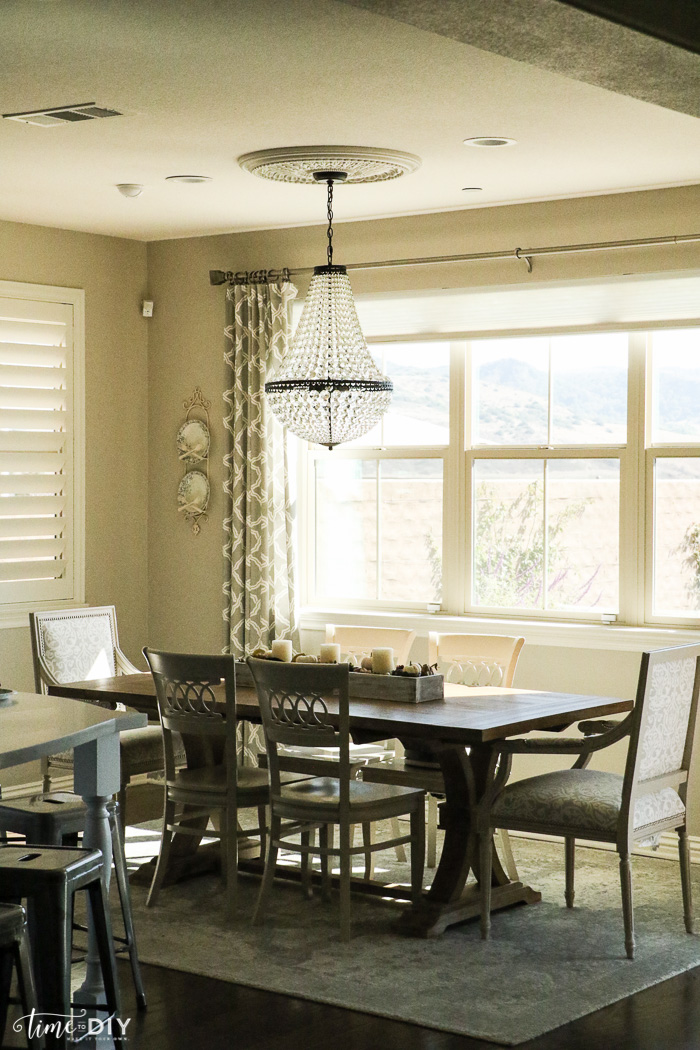
And now I need to think about adding drapes to that back window, maybe some wall treatment…it really never ends, does it? But it’s fun!
Follow me on Facebook | Instagram | Twitter for more DIY home decor ideas. Hope you have a wonderful day!


Leave a Reply